Search This Blog

Friday, September 13, 2013

Little Party Feature- Candyland 1st Birthday Party

I'm so excited to share this a-DOR-able Candyland 1st Birthday Party with you!  This was put together by my friend, Jennifer Lemmo, for her precious daughter, and I just love it!  This is such a fun and unique theme... classic, colorful and sweet!  

Some of my fav little details...
- The gumball topiaries!
- The colorful candy bar
- Amazing fondant cake
- Super cute candy themed party favors!


First and foremost, check out the topiaries made entirely of gumballs... so whimsical and fun!  And I also love the colorful oversized candies and lollipop center pieces.  

How fun is this candy bar?!  Filling containers with cute candy is such an easy way to make a party festive... and grouping it all together like this makes such a sweet statement!  Candy can also serve as a party favor for guests.

Wow, this cake is fantastic!  I love the gameboard details around the bottom layer, and of course, all the fondant candies.  Too cute!  And check out the birthday girl's smash cake below... love that darling cherry on top!


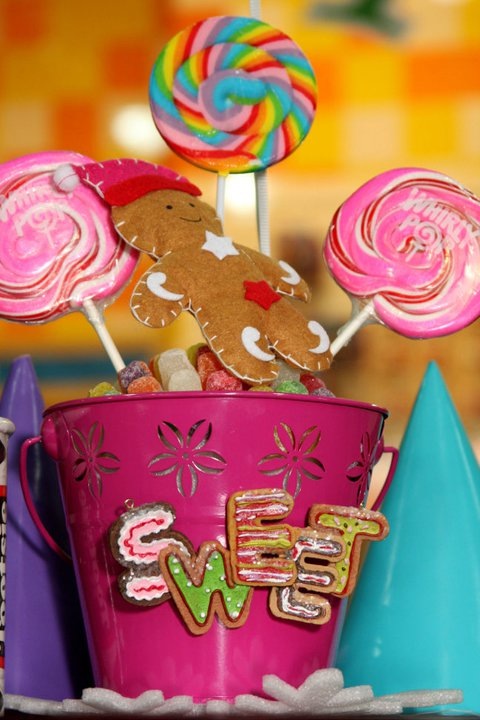
These party favors are so precious!  I love the big cans of tootsie rolls and the felt gingerbread accents.  

Jennifer did such a great job on this party, and I'm so glad she let me share it with you!  As you know, I just love all things colorful and sweet, and this Candyland Party is just my style!  Using the classic Candyland game as a backdrop is such an inspired twist on a candy party.  What a fun way to celebrate birthdays for kids of all ages!  

Happy Little Party ! ! ! 


Friday, September 6, 2013

Twin 1st Birthday- Unisex BOY/GIRL Owl Birthday Party

Right now I'm gearing up for my boy/girl twins' 3rd Birthday Party!  I can't believe how fast time has flown by and how big they're getting!  And as I'm working on this year's party, I'm reminiscing about parties past.  So, today I'm going to share with you my fav pics of my TWINS' 1ST BIRTHDAY PARTY.  I had so much fun putting this party together, and I was beyond thrilled when it was featured on Kara's Party Ideas.  Check out the original post here!

For those of you that know me, you know all about my love (read: obession) with owls!  It was such a fun unisex theme for the party (and for me!).  I wanted the party to be whimsical and colorful, so a bright color scheme and sweet little owls were absolutely perfect.  I made all of the decorations and the invitations myself using clip art I purchased on etsy.com.  With this clip art, I made the invitations, signs, a birthday banner, etc.  The clip art "birthday papers" from etsy were the inspiration for the entire color scheme of the party!

Some of my fav little details:
- The colorful Happy Birthday Banner
- The Owl Tree wall decor behind the twins' high chairs
- The gorgeous (and delicious!) cake (which I can't take credit for!)
- The Owl Oreo Pops
- The cute and fuzzy plush owl party favors
- The gorgeous photography by Claire McCormack Photography
- My blowout... seriously, this was the first time I went to the DryBar, and it got me hooked!
This beautiful cake was from Dallas Affaires Cake Company.  This was before I had ever even considered making my own cakes, and, I must admit, I love it!  The fondant owls were just so adorable, and I love the colorful tulle on top.  And this was one of the best cakes I have ever tasted!

I started working on this Happy Birthday Banner a couple of months before the birthday party.  It was inspired by a number of banners I saw on etsy.  I love all the different colors and patterns and especially all the different fun ribbons I used to tie it all together!  I purposely made this banner so that it could be used for lots of different future themed birthday parties... and I did end up using it again for their second birthday!  All I did was cover the owls with the following year's theme, and voila!  Perfect re-usable banner!  

Another easy detail I love are the cute little vases of daisies on the mantel.  I have used these little bud vases over and over and over again... all I did was knot different color ribbon around the necks and fill them with cheap daisies.  I thought it turned out so fun and was such an inexpensive way to add fresh flowers into the mix!

One of my main focuses was the twins' high chairs.  I knew this would be the backdrop for the most important pictures of the party... the 1st Birthday Cake Smash!  So, I wanted to make it really cute and festive.  I realized that I had a blank wall space in our entry way across from the dining room where the food was going to be, so I thought that would be the perfect spot to set up... both out of the way and with lots of room for everyone to gather around!  Our high chairs were pretty plain (boring ol' neutral khaki), so I wanted to jazz them up as much as possible.  And it turned out to be so easy!  First I just folded a yard of colorful fabric over the cushion of each chair.  Then, I just printed out big letters, cut them into circles, and strung them across the front of their chairs.  For the backdrop, I purchased a cheap tree wall decal on Amazon.  Then I went back to my original clip art, and printed out two large owls.  I also found these cute rustic wooden plaques at Hobby Lobby that I "hung" from the tree.  I was so pleased with how it turned out!  It was a "make it up as I go" endeavor, and it turned out better than I could have originally imagined!  I just love the pictures of my twins "eating" their first cakes!


I also had so much fun making these birthday hats!  I just printed the "birthday papers" clip art out on card stock, and wrapped it around to form a hat.  The ribbons and pom poms were just stuck on with my trusty hot glue gun.  I knew there was zero chance my kids would actually let me put these on them, but they were just too fun to not make!  And they looked adorable sitting on their high chairs!  


So, I did actually make the smash cakes... my sister had taken a cake decorating class and given me a few tips, so in an effort to save a little money, I made these myself.  These were the first cakes I ever tried to decorate myself, and they actually turned out pretty cute!  The twins wanted NOTHING to do with them though... especially my daughter!  She just cried until we gave her a bottle of milk.  Oh well!  The pictures are priceless!

I tried to go low-key on the food since I spent so much time on the decorations, but I just couldn't pass up trying my hand at these OWL OREO POPS.  They turned out so stinkin' cute and were surprisingly easy to make!  All I did was put a popsicle stick inside the oreo, dip in chocolate, and let dry with 2 little mentos stuck on for eyes.  Then I piped the black and orange icing on them after they dried.  I painted these cute pots and put the Oreo Pops in the pots using planters styrofoam.  


These PRETZEL TWIGS are maybe the easiest cute thing you'll ever make!  Just buy pretzel logs, dip the top half in melted chocolate and cover in sprinkles.  Set on wax paper to dry.  Seriously easy and delicious!  I just tied a ribbon around mason jars and crammed them in there.  I have made these for many parties, and they are such a quick way to give your table some fancy!  
I also had a little CANDY STATION with bags and scoops for guests to pick up as much candy as they wanted.  I don't know if much candy got eaten, but it sure was precious!  These cannisters came from Michaels and are also something that I have used over and over!

Since there are always a variety of ages at a 1st birthday party, I wanted to cater to both the adults and the kiddos.  So, I set up a BIG HOOTIE BAR featuring Sangria and other adult beverages and a LITTLE HOOTIE BAR featuring kid-friendly snack items and drinks.  

One of my favorite things to do for a party is WATER BOTTLE LABELS!  These are so easy to make and give such an ordinary party-staple a fun little makeover.  Water bottle labels have become a party must-have and come with many of the printable party packages you can buy online!

I also had fun making this wreath for the front door... I really wanted to incorporate these lovable BlaBla owls that I had purchased before the twins were born!

And I just adored these sweet little handmade plush owls I found on etsy.com.  They were so soft and were the perfect party favor!  I had this old wire bird cage that turned out to be a fun creative way to display them.  I bought the little wooden crates at Hobby Lobby and spray painted them brown.  These are a great little containers to have on hand to display party favors, candy, snacks, etc at various gatherings.  Yet another item I have used again and again!

And finally, I want to show off the adorable little tutu and bloomers my daughter wore to the party... yet another etsy find (no longer available for purchase)!  They are one of my favorite things EVER, and they looked so cute with the tutu and my daughter's chubby legs.
Wow, I had so much fun putting this party together!  But more than anything, I loved celebrating this milestone with my sweet babies and all of our friends and family.  We worked so hard to bring these babies into this world... from conceiving to premature labor, hospital bedrest, a long exhausting NICU journey, and finally caring for newborn twins.  This day was such a huge blessing for us, and our hearts could not be more full with these two amazing children in our lives.  We praise God for them everyday and are so looking forward to celebrating another beautiful year with these two twinsies.  

Thank you for reminiscing with me!  I hope you'll be able to use some of these ideas for your own little party!

Happy Little Party ! ! !


Monday, September 2, 2013

Little Party Feature- BIG TOP CIRCUS 1st BIRTHDAY

 My sweet friend, Jill Couch, threw the most adorable BIG TOP CIRCUS party for her sweet girl's 1st Birthday, and I am so thrilled she is letting me share it with all of you!  The detail she put into this party is so impressive, and the colors are so joyful and vibrant!  And, it was such fun making the cake for this party... my first true layer cake and my first shot at fondant!

Some of my favorite little details of this party...
- The fun circus themed treats like Cotton Candy, Popcorn, and Circus Peanuts
- The bright colorful decorations... especially the circus elephants, clowns and lions
- The Big Top for little ones to play in
- Cute circus themed games
- And, of course, the BIG TOP CAKE!

First off... I love love love this cake table!  The fabric runner on the table added SO much to this table along with the fun details like the cute paper straws, gumballs, and lollipops!


The circus menagerie centerpieces were adorable and made from stuffed animals picked up over the years during family days at the circus.  And I love the circus-inspired name penant and clowns!


The birthday girl looked so cute in her colorful dress, and this circus big top from Ikea was such a fun playful touch!


Cute labels on bubbles make an easy and festive party favor!


The vintage popcorn machine was a super cute extra touch and made for yummy treats for all the kiddos to snack on.  And who doesn't love cotton candy?!  


And, finally, here are some more shots of the cake I took at home before delivering it to the party... this cake was really fun to make!


Doesn't this cute party make you want to have a circus party of your own?!  

Happy Little Party ! ! !


Sunday, September 1, 2013

Are You Ready for Some Football??.... Part 2

Part 2 of my Football Season Kick-Off is an even easier version of the basic FOOTBALL CAKE!

I wanted to whip up something fun and easy for my nephew's 9th birthday, so I just made the basic football cake using the Wilton First and Ten Football Pan.  After baking and icing the cake, I just painted a cake board with a little cup of green icing and then plopped the football cake right on top.  Then I piped the lace details on the football and jazzed up the cake board with my nephew's name and a border.  It's a lot like the cake I featured yesterday, but a LOT less cake and a LOT less work!  


For some reason, this football cake is really easy to ice smooth!  Don't bother using a star tip... way too much work!  Just give it a quick layer of icing getting it as smooth as you can, and then stick it in the fridge for 20 minutes.  Then give it another quick layer of icing and use your fingers to pat it smoother.  Simple as that!

Happy Little Party!

Saturday, August 31, 2013

Are You Ready for Some Football??.... Part I

LET'S GET READY TO RUMBLE!!!

It's officially FOOTBALL SEASON!!  So, in honor of this awesome time of year, I will be featuring a couple of fun and, more importantly, EASY football cakes both today and tomorrow.  These cakes were made using the Wilton First and Ten Football Pan.  Seriously, y'all, this pan is so easy to use, and this cake is also really easy to ice!

I read all sorts of message boards about how to use this pan before I tried it for the first time, and, trust me, skip all that reading and just BAKE IT!  I was nervous about it not cooking evenly, etc, etc, and truly, all you have to do is just stick it in the oven.  Both times I've used this pan, my football has turned out great!!  

I made the first cake I'm featuring for my dear friend's sweet little boy's 3rd birthday party.  This is a Football Cake on top of a 12x18 sheet cake.  It is a vanilla sheet cake iced smooth with green buttercream icing.  And, actually, the football is iced with vanilla buttercream also... I just tinted it brown!  I iced the football on a cutting board first, and then just carefully plopped it onto the sheet cake.  


Funny story... I decided to put a big number "3" on the cake, so I thought I'd just use my extra brown icing.  My hubby warned me that it was going to look "gross," but I didn't feel like tinting more icing, so I moved forward with a, "thanks honey, I know what I am doing" attitude.  I got that brown 3 on there and wanted to cry... Hubby was right!  It looked like it belonged in a toilet!  I wanted to cry!  So I meticulously and painstakingly lifted that dirty brown 3 off this cake and went about tinting a batch of red icing.  Thank goodness it turned out okay!  

Anyway, back to the cake....

Here's how you make it... 

Blend any cake mix you like with 3 eggs, 1 cup of water and 1 stick of melted better.  Beat on low for 1 minute and then on high for 1 minute.  NOTE- using this recipe makes a boxed cake mix a little denser which will help keep your football in tact!  

Pour 5 cups of batter in your greased up football pan (I like to use Wilton Cake Release), and then place your pan on a cookie sheet.  Stick the whole thing in a 350 degree oven for 50-55 minutes.  Afterwards, let it cool for about 10 minutes, level the "hump" of the cake, and then flip it over onto a wire rack.  

Here's what my chocolate football looked like after baking.... so cute! 


Once your cake cools completely, just ice away!  It's pretty easy to get this cake iced smoothly.  Once you've covered it in brown (or chocolate) icing, use tip #16 to pipe the white icing details like this:


Isn't it fun?!?

Tomorrow's FOOTBALL CAKE is going to be even EASIER than this one.  It's just a basic football without the sheet cake... simple and easy, I promise!  I am in the middle of making it right now for my nephew's 9th birthday... STAY TUNED!


Summer is (basically) Over.... it's Party Time!

Hello Friends!

Well, summer sure did fly by!  I'm sorry for the unintentional summer hiatus... how did our low-key summer end up being so busy?!  But school has started, soccer has kicked-off, dance classes are on the horizon, and it's offically party season at my house!  

Even though it'll probably be 110 degrees today, I'm getting excited about Fall.... which for me means birthday parties, football parties, and eventually holiday parties (yes!)!!  I am so excited for all the things coming up, and I can't wait to share them with you.  I'm working meticulously on my twins' 3rd birthday party, and I am so pumped to share all these fun ideas and the final outcome with you.  And I am working on a lot of sweet cakes to share with you over the next couple of weeks.  It's going to be SO fun!  

Anyway, I'm back in action, so I hope you'll check back often for fun little party ideas!!

xoxo, 

Kelly

Saturday, July 6, 2013

GIRLS NIGHT.... IN!

Need a night with just the ladies?!  How about a Girls Night IN!

This night was all about fun with the girls as hot pink and zebra print set the stage for cupcakes and cherry vodka limeade martinis!  YUM!

All the girls came dressed in their PJ's for this relaxing night in... we had pizza, ate cupcakes, drank delicious cherry vodka limeades in sugar-rimmed martini glasses, and laughed until we cried.... what a fun night! 


The drinks and sweets took center stage on our table with extra touches of confetti, a handmade flower ball and candles.  Before the guests arrived, we added sugar rims and cherries to all the glasses for a bright pop of color.  Scroll down for how to rim your glasses and how to make a festive flower ball!


One of my favorite touches was the sugar rimmed martini glasses.  They're just so girly and fun!  And who knew making COLORED SUGAR could be so easy!  

Here's what you do..... throw the desired amount of sugar in a ziploc bag.  Dip a toothpick in pink gel food coloring (I used Wilton brand found at Michael's, Walmart, etc), and add the gel to the bag of sugar.  Then just shake, press and toss around until the color has dispersed.  So sweet and easy!  

To make the sugar stick to the glasses, we dipped the rims in the cherry juice then rolled it in the colored sugar.  


And for the final touch.... I just love this FUN FLOWER BALL!  It is surprisingly easy to make and can be done in any color you can think of!  I made this hot pink one just for fun one day, and was so happy with how cute it looked on this Girls Night table.  It added the special touch we needed!  Click here for the tutorial I followed to make it.


This turned out to be such a memorable night with the girls... and ended up being way more fun than going out!  We had lots of girl talk, played games (Never Have I Ever, anyone?!) and even recruited my husband for a hysterical round of Catch Phrase!  

What a..... HAPPY LITTLE PARTY ! ! !