Search This Blog

Showing posts with label Cakes. Show all posts

Wednesday, September 18, 2013

Twin Boy/Girl MICKEY & MINNIE MOUSE Birthday Party

What fun it was planning this Mickey and Minnie Party for my twins' 3rd Birthday!  My kiddos love (I mean, LOVE!) Mickey Mouse Clubhouse, so I thought it would be a great Boy/Girl theme for their party this year.  And on top of that, we just took our first trip to Disneyland this summer, so it really summed up our year too!  

Mickey/Minnie Mouse is an age-old, classic theme for kids (pretty sure MY 1st Birthday Party was Minnie Mouse themed!) which means there are a TON of fun ideas out there... but that also creates a challenge to make it unique and different!  I decided to build the party around the Mickey silhouette using the classic Mickey colors of red, yellow, and black.  I wanted the party to be bright and colorful but also chic... it's easy for a Mickey party to go a little (or a LOT) cheesy, so I wanted to give the party a flare of classic sophistication!  (Okay... I need a synonym for classic!)

A few of my fav little details...
- The Balloon Wreath 
- The personalized Mickey Party Favor cups
- The Mickey/Minnie Centerpieces
- The Mickey Mouse Birthday Cake!

To welcome guests to the party, I made a Mickey-Inspired Balloon Wreath for our front door.  I could not believe how easy this was to make... I made it in less than an hour!  I took lots of pictures of the process, so I will be posting a HOW-TO soon!  
The glove pinned on the wreath was actually purchased on etsy last year as part of my twins' Halloween costume.  They were WAY too big for them to wear last year, but the felt gloves came in handy for this party BIG TIME!  I set them all throughout the party!  

The signs attached to the wreath were made using my new Cricut Expression 2.  This was my first time using this machine, and it was so much fun!  

The centerpiece of the party was the Cake & Treat Table.  I hung red tablecloths in front of the windows as a backdrop and used boxes draped with yards of "Mickey-inspired" fabric to create height and dimension.  The table was covered in a white tablecloth and then layered with black and white polka dot fabric... fabrics are such an easy and cheap way to add pop to a table!   I also used containers (such as the candy dishes) in varying heights and shapes to add interest and tied on lots of ribbon in the party colors to add flare to everything on the table.  
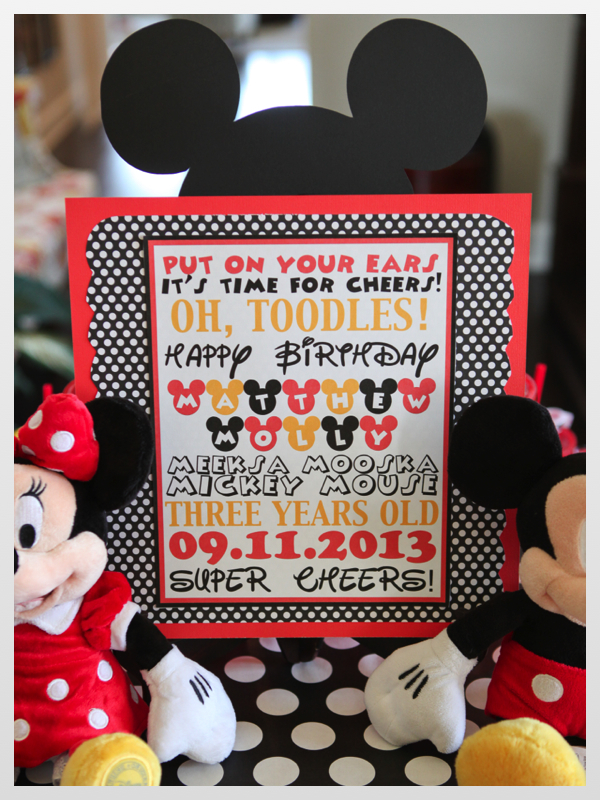
The "Matthew" and "Molly" decorations and the "Happy Birthday" Banner were made using my Cricut paper cutting machine.  I bought the Mickey Mouse and other yellow, red, and black papers at Hobby Lobby and Michaels, and used them (and my Cricut!) for decorations throughout the party.  The fun papers are another cheap way to add fun and continuity to your party with signs, food labels, etc.  The little red pails were from Party City and cost about $0.50 each with my coupon!  
I didn't want to go too overboard with sweets on the table, but I did want to make a couple of easy treats that would make the table look really special and whimsical.  

The Mickey Lollipop Mold came from Amazon, and I made the suckers with red and yellow candy melts.  These were a HUGE hit with my daughter... she ate 5 of them while we were waiting for guests to arrive!  A little over-indulgence on your birthday never hurts, right?!  I spray painted a little wooden crate, tied ribbon around it, and stuck a piece of styrofoam in the center to display the suckers!  

I make these pretzel twigs for almost every party I have, because they are ridiculously easy and yummy!  And it's so easy to customize them in the colors of each party.  They look so cute gathered together in little mason jars like this, and the kids loved carrying them around the party! 
This was my first time making chocolate dipped Rice Krispie treats, and I am so happy with how they turned out!  I made these AND the pretzel twigs in less than an hour!  
And now for the cake.... 
I looked at HUNDREDS of pictures of Mickey Mouse cakes online and on Pinterest.  I mean, HUNDREDS... twice!  The majority of the cakes I found were full fondant cakes- covered in fondant and decorated in fondant.  Now, I'm new to cake decorating, and I haven't ventured very far into the world of fondant.  Plus, with decorating an entire party and hosting it at my home, I knew I wasn't going to have the hours upon hours of time it would take me to figure out how to perfectly cover multiple layers of cake in fondant and do intricate fondant decorations.  In fact, I debated if I was crazy to even try to do a cake AT ALL.... and yes, as it turns out, I am crazy... but not for this reason alone!  

Anyway, I decided I would just stick with an all-white buttercream-iced cake and do simple fondant decorations.  Many of the cakes I saw online also had lots of different colored layers... I don't know about you, but I'm not a big fan of red icing.  It's messy and doesn't taste very good, so I wanted to just stick with all-white (other than the necessity of black icing for the Mickey hat which wasn't going to get eaten anyway!).

The Mickey ears were made from fondant a couple of days ahead of time.  I put a popsicle stick between 2 fondant circles and let them dry on the counter for a couple of days.  I stuck them in the cake the morning of the party, and they held up great!

I am really happy with how the cake turned out!  It's pretty simple, but I think it went great with my table, and my kids thought it was so cool!  


I had one other main area to decorate, and that was the all important FOOD TABLE!  
Going with the Mickey Mouse theme, we decided to serve Hot Diggity Dogs.  So, I created a Hot Diggity Dog Bar complete with all the fixins', chips, guacamole, and fruit.  
Also for the Hot Diggity Dog Bar... I had seen these styrofoam Mickey and Minnie Centerpieces on Pinterest, and I just had to incorporate them somewhere!  I found the Sytrofoam Balls at Hobby Lobby and painted them using black acrylic paint and sponge brushes.  I think they turned out so super cute!!
And now for the PARTY FAVORS!  
As you know, I got a little over-zealous with my new Cricut machine, and after discovering that it cut vinyl adhesive paper, I just couldn't help but make these personalized Mickey cups.  I knew this was going to be SO MUCH WORK, but I just really really wanted to make them!  (I told you I am CA-RAZY!) I was so happy with how they turned out and even happier with how much all of the kids LOVED them!  They all had fun searching for their initials, and I found some kids drinking from their new cups during the party!  I found the cups at a dollar store (well, actually 5 dollar stores), and they were surprisingly good quality... and I was beyond pleased to hear from guests that they went right through the dishwasher perfecly!  WOOT WOOT!  
Oh, I just love this little sign too... 
Of course, I spent all these hours making this party as cute as can be, and the real hit of the party was these SUPER FUN BOUNCE HOUSES!  
And the very best part is that the bounce house rental joint didn't come pick them up for a couple of days, so my hubby and little twins and I got to have our very own family bounce night the evening after the party.  Beautiful memories!
Seriously this party was such a joy for me to put together, and it was so fun seeing my sweet twins' little faces when they came downstairs for their party. I hope it will inspire you to add fun little touches to your parties and give you some easy ideas to make them special and unique.  

Happy Little Party ! ! ! 

Photography by Claire McCormack.
Party Decor and Design by Kelly Little.


Friday, September 13, 2013

Little Party Feature- Candyland 1st Birthday Party

I'm so excited to share this a-DOR-able Candyland 1st Birthday Party with you!  This was put together by my friend, Jennifer Lemmo, for her precious daughter, and I just love it!  This is such a fun and unique theme... classic, colorful and sweet!  

Some of my fav little details...
- The gumball topiaries!
- The colorful candy bar
- Amazing fondant cake
- Super cute candy themed party favors!


First and foremost, check out the topiaries made entirely of gumballs... so whimsical and fun!  And I also love the colorful oversized candies and lollipop center pieces.  

How fun is this candy bar?!  Filling containers with cute candy is such an easy way to make a party festive... and grouping it all together like this makes such a sweet statement!  Candy can also serve as a party favor for guests.

Wow, this cake is fantastic!  I love the gameboard details around the bottom layer, and of course, all the fondant candies.  Too cute!  And check out the birthday girl's smash cake below... love that darling cherry on top!


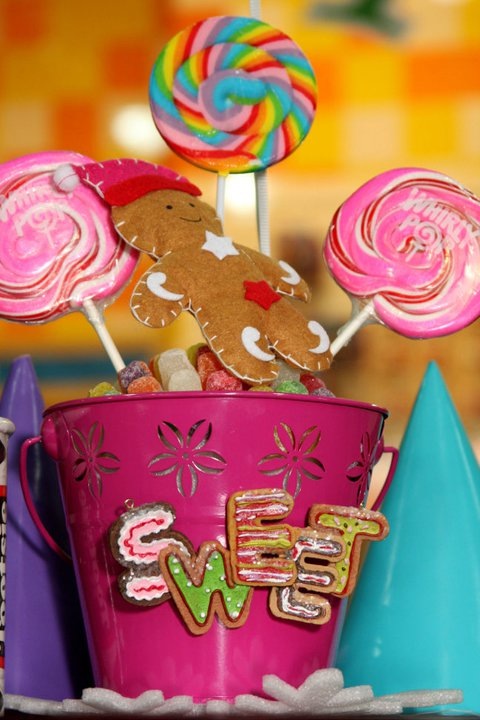
These party favors are so precious!  I love the big cans of tootsie rolls and the felt gingerbread accents.  

Jennifer did such a great job on this party, and I'm so glad she let me share it with you!  As you know, I just love all things colorful and sweet, and this Candyland Party is just my style!  Using the classic Candyland game as a backdrop is such an inspired twist on a candy party.  What a fun way to celebrate birthdays for kids of all ages!  

Happy Little Party ! ! ! 


Monday, September 2, 2013

Little Party Feature- BIG TOP CIRCUS 1st BIRTHDAY

 My sweet friend, Jill Couch, threw the most adorable BIG TOP CIRCUS party for her sweet girl's 1st Birthday, and I am so thrilled she is letting me share it with all of you!  The detail she put into this party is so impressive, and the colors are so joyful and vibrant!  And, it was such fun making the cake for this party... my first true layer cake and my first shot at fondant!

Some of my favorite little details of this party...
- The fun circus themed treats like Cotton Candy, Popcorn, and Circus Peanuts
- The bright colorful decorations... especially the circus elephants, clowns and lions
- The Big Top for little ones to play in
- Cute circus themed games
- And, of course, the BIG TOP CAKE!

First off... I love love love this cake table!  The fabric runner on the table added SO much to this table along with the fun details like the cute paper straws, gumballs, and lollipops!


The circus menagerie centerpieces were adorable and made from stuffed animals picked up over the years during family days at the circus.  And I love the circus-inspired name penant and clowns!


The birthday girl looked so cute in her colorful dress, and this circus big top from Ikea was such a fun playful touch!


Cute labels on bubbles make an easy and festive party favor!


The vintage popcorn machine was a super cute extra touch and made for yummy treats for all the kiddos to snack on.  And who doesn't love cotton candy?!  


And, finally, here are some more shots of the cake I took at home before delivering it to the party... this cake was really fun to make!


Doesn't this cute party make you want to have a circus party of your own?!  

Happy Little Party ! ! !


Sunday, September 1, 2013

Are You Ready for Some Football??.... Part 2

Part 2 of my Football Season Kick-Off is an even easier version of the basic FOOTBALL CAKE!

I wanted to whip up something fun and easy for my nephew's 9th birthday, so I just made the basic football cake using the Wilton First and Ten Football Pan.  After baking and icing the cake, I just painted a cake board with a little cup of green icing and then plopped the football cake right on top.  Then I piped the lace details on the football and jazzed up the cake board with my nephew's name and a border.  It's a lot like the cake I featured yesterday, but a LOT less cake and a LOT less work!  


For some reason, this football cake is really easy to ice smooth!  Don't bother using a star tip... way too much work!  Just give it a quick layer of icing getting it as smooth as you can, and then stick it in the fridge for 20 minutes.  Then give it another quick layer of icing and use your fingers to pat it smoother.  Simple as that!

Happy Little Party!

Saturday, August 31, 2013

Are You Ready for Some Football??.... Part I

LET'S GET READY TO RUMBLE!!!

It's officially FOOTBALL SEASON!!  So, in honor of this awesome time of year, I will be featuring a couple of fun and, more importantly, EASY football cakes both today and tomorrow.  These cakes were made using the Wilton First and Ten Football Pan.  Seriously, y'all, this pan is so easy to use, and this cake is also really easy to ice!

I read all sorts of message boards about how to use this pan before I tried it for the first time, and, trust me, skip all that reading and just BAKE IT!  I was nervous about it not cooking evenly, etc, etc, and truly, all you have to do is just stick it in the oven.  Both times I've used this pan, my football has turned out great!!  

I made the first cake I'm featuring for my dear friend's sweet little boy's 3rd birthday party.  This is a Football Cake on top of a 12x18 sheet cake.  It is a vanilla sheet cake iced smooth with green buttercream icing.  And, actually, the football is iced with vanilla buttercream also... I just tinted it brown!  I iced the football on a cutting board first, and then just carefully plopped it onto the sheet cake.  


Funny story... I decided to put a big number "3" on the cake, so I thought I'd just use my extra brown icing.  My hubby warned me that it was going to look "gross," but I didn't feel like tinting more icing, so I moved forward with a, "thanks honey, I know what I am doing" attitude.  I got that brown 3 on there and wanted to cry... Hubby was right!  It looked like it belonged in a toilet!  I wanted to cry!  So I meticulously and painstakingly lifted that dirty brown 3 off this cake and went about tinting a batch of red icing.  Thank goodness it turned out okay!  

Anyway, back to the cake....

Here's how you make it... 

Blend any cake mix you like with 3 eggs, 1 cup of water and 1 stick of melted better.  Beat on low for 1 minute and then on high for 1 minute.  NOTE- using this recipe makes a boxed cake mix a little denser which will help keep your football in tact!  

Pour 5 cups of batter in your greased up football pan (I like to use Wilton Cake Release), and then place your pan on a cookie sheet.  Stick the whole thing in a 350 degree oven for 50-55 minutes.  Afterwards, let it cool for about 10 minutes, level the "hump" of the cake, and then flip it over onto a wire rack.  

Here's what my chocolate football looked like after baking.... so cute! 


Once your cake cools completely, just ice away!  It's pretty easy to get this cake iced smoothly.  Once you've covered it in brown (or chocolate) icing, use tip #16 to pipe the white icing details like this:


Isn't it fun?!?

Tomorrow's FOOTBALL CAKE is going to be even EASIER than this one.  It's just a basic football without the sheet cake... simple and easy, I promise!  I am in the middle of making it right now for my nephew's 9th birthday... STAY TUNED!


Sunday, June 30, 2013

Lingerie Cake

I had so much fun making this lingerie inspired cake for my lifelong friend's Bachelorette Party & Lingerie Shower!  It was way bigger than necessary, but big cakes are just way more fun than small cakes!  

Almost all of the bustier cake ideas I found online were made with fondant, but I really wanted to try to make this all buttercream.  I'm so happy with how it turned out!  

Cake and Photo by Kelly Little
To make the cake I used my Wilton Sports Ball Pan and a 12x18 sheet pan.  I had planned to make just one sheet layer, but the first cake was a little thin, so I ended up layering 2 sheets together.  In total, I used 7 cake mixes to make this cake!!  I used my favorite boxed mix recipe for Vanilla Cake from TidyMom.com.  This makes a soft but slightly denser cake than using the recipe from the box... which makes carving a cake much easier!

Here's how I pieced it together....
Cake and Photo by Kelly Little
After layering the sheet cakes and adding the "bra top," I carved the sides and top of the cake to look like a bustier.  
Cake and Photo by Kelly Little
 Then came the icing....
Cake and Photo by Kelly Little
And decorating.... it's funny how decorating the cake is the quickest and easiest part of all!  And most fun, of course!
Cake and Photo by Kelly Little
So much fun for a Lingerie Shower or Bachelorette Party!

Happy Little Party ! ! !